
Free Beginner Crochet Baby Bonnet Pattern
The Everly Pixie Bonnet

The Everly Bonnet is a pixie style bonnet. A simple rectangle is stitched, folded in half and then sewn up the back to form the bonnet. This is a great beginner project and uses only simple stitches. A border is added to the bottom of the bonnet and then two straps. The pattern includes 5 sizes; 0-3 months, 3-6 months, 6-12 months, 1-2 years and 3-5 years. Make sure you check out the Everly Collection which includes a summer hat, skirt and dress.
The Everly Pattern Collection
I love to design collections using the same stitch patterns. The Everly Collection includes 3 more gorgeous patterns!
The Everly Summer Hat


I would like to welcome the beautiful Everly Summer Hat to my pattern collection. This is my first summer hat design and I am thrilled with how it turned out. The pattern comes in 7 sizes; 0-6 months, 6-12 months,1-2 years, 3-5 years, 6-10 years, Teen, and Adult. This hat works up so quickly so you will be able to make one in a couple of evenings or a long, lazy afternoon. The pattern includes all the written instructions you need plus some video tutorials for any tricky techniques. The hat is quite stretchy so fits a with a negative ease of 0-5cm/0-2 in. Keep cool and look cool with the Everly Summer Hat!
The Evelry Top


The Everly Top is the perfect addition to your little one’s summer wardrobe. The garment is made from two panels and then sewn together. The peplum ruffle and sleeve ruffles are then stitched onto the top. The gorgeous lace pattern uses single and double crochet stitches which makes it easy, even for a beginner. There is also a video tutorial included for the lace pattern and loads of photos to help you along the way. Finally two ties are secured to the back of the Everly Top to tie the back closed. Perfection!
The Everly Skirt
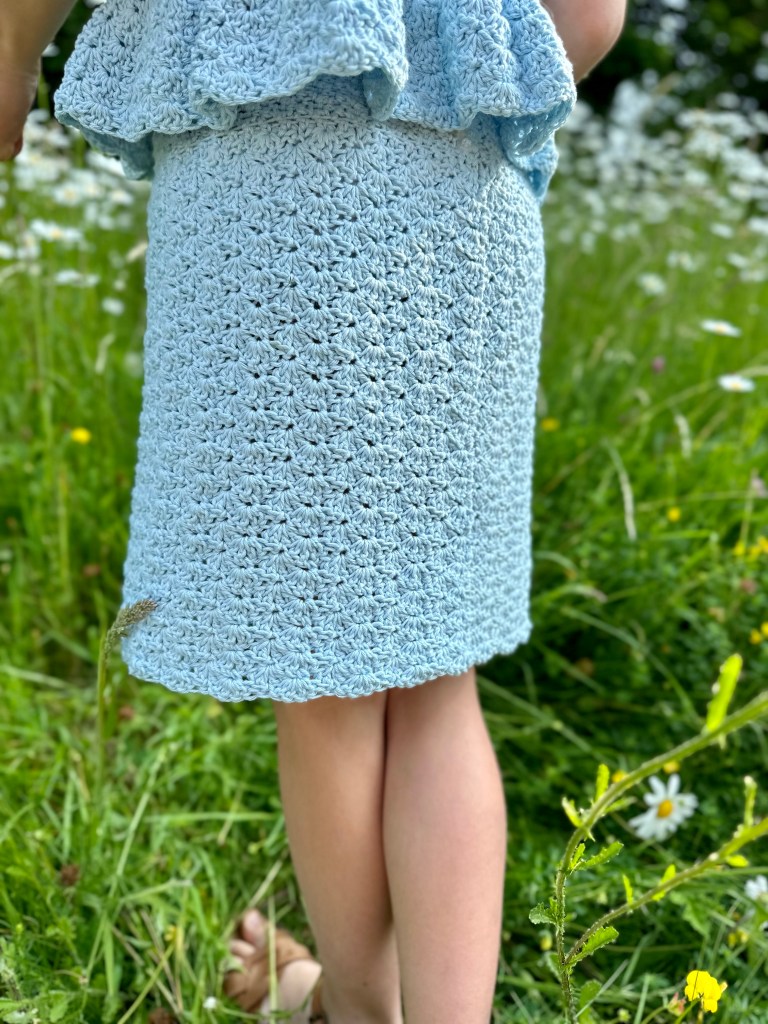


The Everly Skirt is a super simple and easy design to make. The skirt will look gorgeous with a light summer blouse or you can make the matching Everly Top. The pattern starts with making the waistband using dc and sc stitches. Next the skirt is stitched directly onto your finished waistband. Add length to the skirt with the repeating lace motif pattern that will be easy for you to memorize in minutes! The last step is to weave in your ends and sew on the buttons. That’s it!
Buy the Ad Free, Colour Coordinated Pattern

If you would like to purchase the ad free, colour coordinated version that is easy to access from your phone or i-pad, no scrolling involved you can easily get the pattern now!
The Pattern

U.S. Terms
Materials
*4.00mm (U.S. G/6) crochet hook or size needed to obtain gauge
*DK yarn I used I used Paintbox Yarns Cotton DK in the colour Banana Cream (421). 125m/137yds/50g per skein. If you purchase from this link, I will earn a small commission and can continue creating my patterns. Your support means the world to me!See chart below for approximately how much yarn you will need.
Stitches and Abbreviations
st or sts- stitch or stitches
ch- chain stitch
dc- double crochet
hdc- half double crochet
sc- single crochet

| Gauge Swatch | |||||||||
| 19sts/12rows to measure 11.5cmX10cm (4.5X4 inch) | |||||||||
| *Note* The gauge of the stitch pattern did not quite work out to an even square so make sure you are measuring that 19 sts is 11.5cm/4.5in. | |||||||||
| ch 25 | |||||||||
| Row 1 | |||||||||
| 3 dc in the 4th ch from hook, sk the next 2 chs, sc in the next ch, *sk the next 2 chs, 4 dc in the next st, sk the next 2 chs, sc in the next ch, repeat from * to the end of the ch, turn (19 sts) | |||||||||
| *You will have 4 shells and 4 sc’s. The first shell will be the ch3 plus 3 dc (see photo) | |||||||||
| Row 2 | |||||||||
| ch3 (do not count this as a stitch), 3dc in the first st, sk the next 2 sts, *place a sc between the 2nd & 3rd dc from the previous row, sk the next 2 sts, 4 dc in the next sc, repeat from * to the last st, place a sc in the last st, turn (19sts) | |||||||||
| Repeat row 2 until you have a total of 12 rows. Your swatch should measure 11.5cmX10cm (4.5X4 inch) | |||||||||

Lace Shell Video Tutorial
| Bonnet Body | ||||||
| *Note* -The bonnet is reversible so you do not have to worry about RS or WS. -When counting shells, the 3dc at the beginning of each row will count as your first shell. | ||||||
| Leave a long tail for sewing the back of the bonnet later. | ||||||
| Ch | 61 | 67 | 73 | 79 | 85 | |
| Row 1 | ||||||
| 3 dc in the 4th ch from hook, sk the next 2 chs, sc in the next ch, *sk the next 2 chs, 4 dc in the next st, sk the next 2 chs, sc in the next ch, repeat from * to the end of the ch, turn | ||||||
| Total Stitches | 49 | 54 | 59 | 64 | 69 | |
| Total Shells | 10 | 11 | 12 | 13 | 14 | |
| Row 2 | ||||||
| ch3 (does not count as a st here and throughout), 3dc in the first st, sk the next 2 sts, *place a sc between the 2nd & 3rd dc from the previous row, sk the next 2 sts, 4 dc in the next sc, repeat from * to the last 3sts, sk the next 2 sts, place a sc in the last st, turn | ||||||
| Total Stitches | 49 | 54 | 59 | 64 | 69 | sts |
| Total Shells | 10 | 11 | 12 | 13 | 14 | |
| Repeat row 2 until the bonnet width measures: | 15 | 16.5 | 18 | 19 | 20.5 | cm |
| 6 | 6.5 | 7 | 7.5 | 8 | in | |
| Do not break yarn. Fold the bonnet in half and sew the back using a mattress stitch. See photos below. | ||||||


| Decrease of Bonnet Neck | ||||||
| We will now be working along the bottom of the bonnet into the ends of each row. | ||||||
| Row 1 | ||||||
| ch1, place one hdc st into the end of each row of lace along the bottom of the bonnet, turn | ||||||
| Row 2 | ||||||
| ch1, hdc in each st across, turn | ||||||
| Row 3 | ||||||
| ch1, hdc in each st across | ||||||
| Do not break yarn, proceed to straps. | ||||||


| Strap 1 | ||||||
| ch | 45 | 50 | 55 | 60 | 65 | |
| sts for the strap, sc in the 2nd ch from hook and in each ch up the strap, break yarn | ||||||
| Total sts | 44 | 49 | 54 | 59 | 64 | sts |
| Strap 2 | ||||||
| Join yarn to the other corner of the bonnet to make the other strap. | ||||||
| ch | 45 | 50 | 55 | 60 | 65 | |
| sts for the strap, sc in the 2nd ch from the hook and each ch up the strap, break yarn | ||||||
| Total sts | 44 | 49 | 54 | 59 | 64 | sts |


