Willow Cardigan
This post contains some affiliate links. If you click on the link and purchase I will receive a small commission. This way I can continue creating my patterns and giving them to you for free.

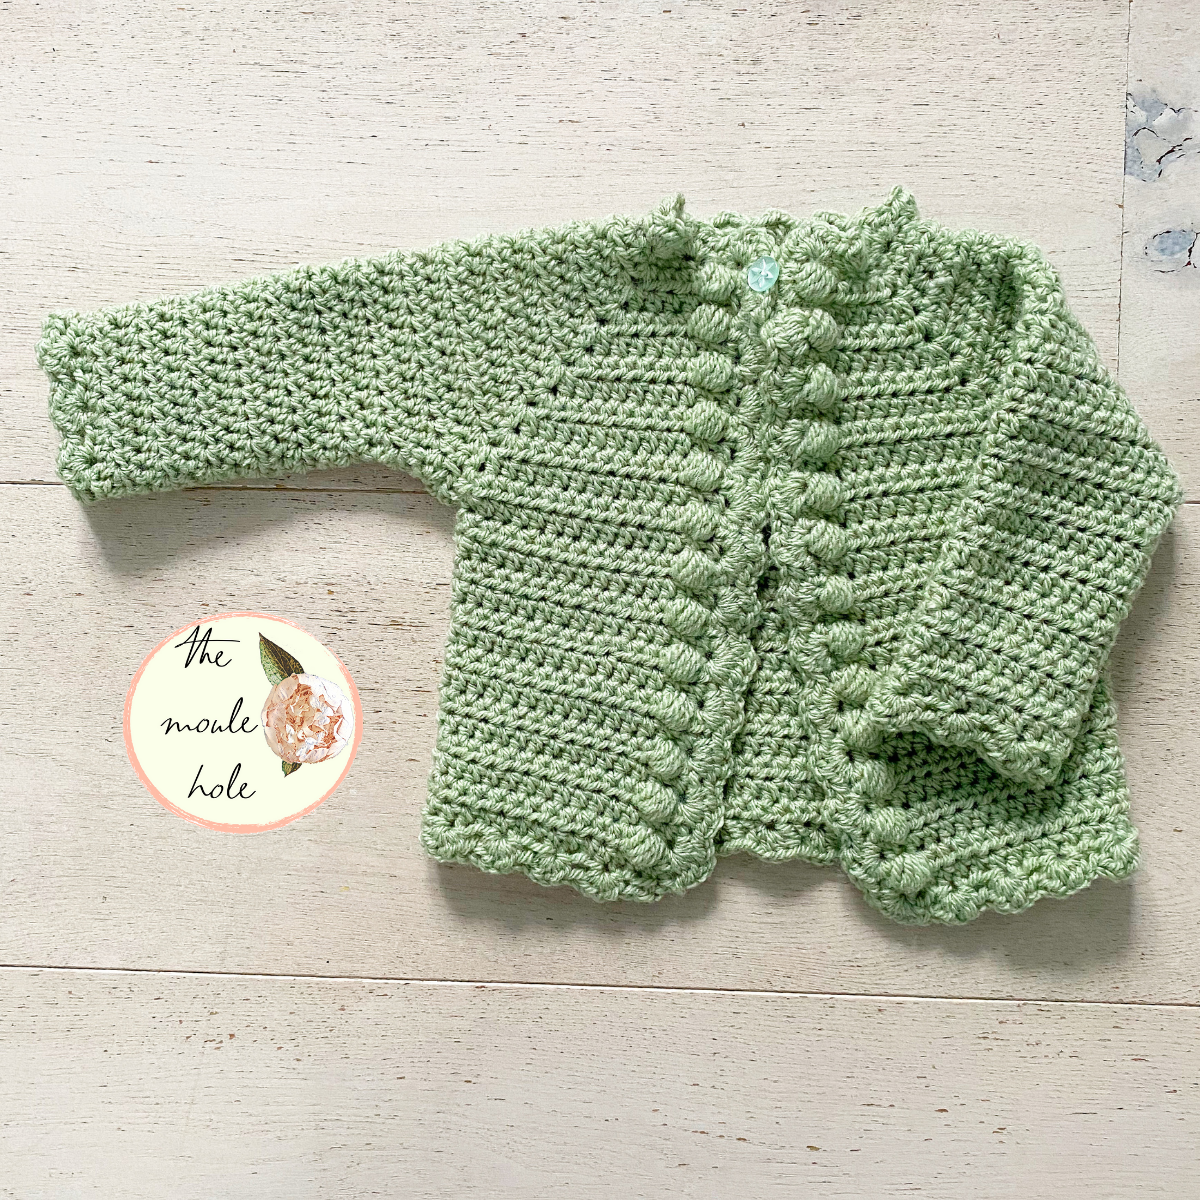
Your “Go To” Baby Girl Sweater
I made this little cardigan for a friend who had a baby girl. I wasn’t going to write out the pattern but when I showed the design to a few people they all went crazy for it. I decided then and there I had to write out the pattern so everyone could make it. This little cardigan is great because it works up so quickly and it is so easy! The results are stunning! Hope you enjoy making it as much as I did.
Construction & Fit
This is a raglan style cardigan and is worked from the top down all in one piece. The sleeves are added at the end. I only added one button to the top of the cardi but it would be super easy to add more. Luckily, the buttons fit through the holes created by the edging. Bonus! The Willow Cardigan should fit with a positive ease of 1-3 inches. This means it should be 1-3 inches larger than the chest of the child you are making it for.
Buy the Ad Free, Colour Coordinated Pattern
Why should I buy the pattern you may ask? My patterns are colour coordinated by size and so easy to read! The pdf is printable and totally worth the money! There is also a table with all the stitch counts for the yoke rows so you can easily keep track of your stitch counts. You can purchase the ad free and colour coordinated pdf pattern on Etsy, Ravelry or LoveCrafts.

Materials:


*5.00mm (U.S H/8) crochet hook or size needed to obtain gauge.
*Hayfield Aran (worsted weight) yarn in the colour Haze (751) or Paintbox Yarns Simply Aran. If you purchase from these links, I will earn a small commission and can continue creating my patterns. Your support means the world to me! See chart below for approximately how much yarn you will need.
*4 stitch markers
*1 small button

Gauge
15 stitches/10.5 rows= 10cmX10cm (4X4 inch) in hdc
Do you need to do a gauge swatch??? YES and here is why…Click the photo below to find out.

Stitches and abbreviations
st or sts- stitch or stitches
ch- chain stitch
sl st- slip stitch
sp- space
sc- single crochet
hdc- half double crochet
hdc-shell- see explanation on the next page
puff- see explanation on page 4
PSM- place stitch marker
RMS- remove stitch marker
In- increase
Measurements & Yarn Requirements
| Size | Approximate Chest of Cardigan | Yarn (Approximate) |
| 0-6mo | 44.5cm/17.5in | 370m/400yds/175g |
| 6-12mo | 47cm/18.5in | 420m/460ys/200g |
| 12-18mo | 51cm/20in | 470m/520yds/225g |
| 1½-2 | 56cm/22in | 525m/575yds/250g |
| 3-4 | 61cm/24in | 580m/630yds/275g |
| 5-6 | 68.5cm/27in | 735m/800yds/350g |
| 7-8 | 73.5cm/29in | 840m/920yds/400g |
| 9-10 | 79cm/31in | 945m/1030yds/450g |
Sizing is written as follows: 0-6months(6-12 months, 12-18 months, 1.5-2 years, 3-4 years, 5-6 years, 7-8 years, 9-10 years)

Special Stitches
Hdc-shell:
2 hdc/ch1/2hdc in the next stitch, sk 2 sts

Puff Stitch:
yarn over, insert hook into st, pull up a loop, repeat from *
4 more times (there will be 11 loops on your hook), yarn over, pull through all 11 loops.


The Pattern
YOKE
Ch 38 [ 38, 46, 46, 46, 50, 50, 50]
Row 1 (RS):
sc in the 2nd ch from hook and in each ch to the end of the row, turn
Total stitches:
| 37 | [37 | 45 | 45 | 45 | 49 | 49 | 49 | sts] |
Row 2 Marker Row Set-up (WS)
Front
ch2, hdc in the first st, puff in the next st, hdc in the next 3[3,4,4,4,5,5,5] sts
Sleeve
hdc/ch1/hdc in the next st PSM in the ch st
hdc in the next 5[5,7,7,7,7,7,7] sts
hdc/ch1/hdc in the next st PSM in the ch st
Back
hdc in the next 13 [13,15,15,15,17,17,17]sts
Repeat Sleeve
Front
hdc in the next 3[3,4,4,4,5,5,5] sts, puff in the next st, hdc in the last st, turn
Total Stitches:
| 45 | [45 | 53 | 53 | 53 | 57 | 57 | 57] | sts |
Row 3 (RS)
Front
ch2, hdc in each st to the marker
Sleeve
RSM hdc/ch1/hdc in the ch sp PSM in the ch st
hdc in each st to the next marker
RSM hdc/ch1/hdc in the ch sp PSM in the ch st
Back
hdc in each st to the st marker
Sleeve
RSM hdc/ch1/hdc in the ch sp PSM in the ch st
hdc in each st to the next marker
RSM hdc/ch1/hdc in the ch sp PSM in the ch st
Front
hdc in each st to the end of the row
Total Stitches:
| 53 | [53 | 61 | 61 | 61 | 65 | 65 | 65] | sts |
Row 4 (WS)
Front
ch2, hdc in the first st, puff in the next st, hdc in each st to the marker
Sleeve
RSM hdc/ch1/hdc in the ch sp PSM in the ch st
hdc in each st to the next marker
RSM hdc/ch1/hdc in the ch sp PSM in the ch st
Back
hdc in each st to the st marker
Sleeve
RSM hdc/ch1/hdc in the ch sp PSM in the ch st
hdc in each st to the next marker
RSM hdc/ch1/hdc in the ch sp PSM in the ch st
Front
hdc in each st to the last two sts, puff in the next st, hdc in the last st, turn
| 61 | [61 | 69 | 69 | 69 | 73 | 73 | 73] | sts |
Repeat Rows 3 & 4 until you have completed 9, 11, 11, 13, 15, 17, 19, 21 rows from the first row.
Total Stitches:
| 101 | [117 | 125 | 141 | 157 | 177 | 185 | 209] | sts |
Sleeve Separation (WS)
ch2
hdc in the first st, puff in the next st, hdc in each st to the marker
RSM, hdc in ch sp
skip the next 21[25,27,31,35,39,43,47]sts
[PSM in the first and last of the skipped sts]
RSM, hdc in the ch sp
hdc in the next 29[33,35,39,43,49,53,57] sts
RSM, hdc in ch sp
skip the next 21[25,27,31,35,39,43,47]sts
[PSM in the first and last of the skipped sts]
RSM, hdc in ch sp
hdc to each st to the last two sts, puff in the next st, hdc in the last st
turn
Total Stitches:
| 59 | [67 | 71 | 79 | 87 | 99 | 107 | 115] | sts |


Body
Row 1 (RS)
ch2
hdc in each st across the row, turn
Row 2 (WS)
ch2
hdc in the first st, puff in the next st, hdc in each st to the last two sts of the row, puff in the next st, hdc in the last st, turn
Repeat rows 2 & 3 until your cardigan measures 9cm/3.5in[10cm/4in,11.5cm/4.5in, 15cm/6in, 19cm/7.5in, 25.5cm/10in, 29cm/11.5in, 33cm/13.5in] from underneath the arm or your desired length. Make sure you end on a Row 1 (WS), do not break yarn
Edging
Turn the cardigan so that you are working up the righthand inside edge and switch to a 4mm hook.
Ch2, hdc in the first row, as evenly as possible hdc-shell up the inside edge of the cardigan, around the collar, down the lefthand inside edge and along the bottom edging to the last st, hdc in the last st, sl st to the first hdc and break yarn.
Sleeves

Turn cardigan to the WS. Join yarn to the center bottom of the armhole.
Row 1 (WS) (see picture above)
ch2, work 2 hdc [between ch and the marked st], hdc in the next
work 2 more hdc between the marked st and the ch, sl st to the first st here and throughout, turn
Row 2 (RS)
ch2, hdc2tog, hdc in each st to the last 2 sts, hdc2tog, turn
Row 3 (WS)
ch2, hdc2tog, hdc in each st to the last 2 sts, hdc2tog, turn
Row 4 (RS)
ch2, hdc2tog, hdc in each st to the last 2 sts, hdc2tog, turn
Row 5 (WS)
ch2, hdc in each st across, turn
Rows 6-9, repeat row 5
Repeat Rows 4-9 until your sleeve measures 16.5cm/6.5in[19cm/7.5in,20.5cm/8in, 21.5cm/8.5in, 26.5cm/10.5in, 29cm/11.5in, 31.5cm/12.5in, 34.5cm/13.5in] from underneath the arm or your desired length. In other words, you will decrease every 6th row.

Sleeve Edging
Switch to a 4mm hook.
Ch2, hdc in the first st, hdc-shell to the last st, hdc in the last st, break yarn.
Finishing
Weave in ends.
Sew one button to the top of the cardigan.
The “Over The Rainbow Cardigan” might be your next project!


